Sewing our Sanity

Tuesday, May 15, 2012

Ziplist

Today is an appropriate day to post about planning meals. The day after Mother's Day. After spending the day not feeling guilty that my husband was doing the dishes, visiting a couple of garden centers with my parents, and eating a delicious pasta dinner he prepared, today I am back to the usual. (well, it is Tuesday but this is being written Monday night) Planning meals can be a challenge. Getting organized so I don't have to go to the grocery store more than once a week or so is a challenge, too. About a year ago, I discovered eMeals. When you join, you choose a meal plan and print a grocery list for the ingredients. That really simplified things for me. There were seven meals but because each meal made enough for leftovers, I never needed all seven each week. The meals were not always things everyone liked and I thought too many of the ingredients were processed. (Not that I am overly concerned with eating all natural but seriously, how many recipes with canned soup can one eat in a week?) It was great for sticking to a budget and I liked knowing what I was fixing for dinner for the week. When that subscription ran out, I tried 6 o'clock Scramble. I got a weekly menu of five meals but I could go into the recipe archive and switch the meals. And again, I could print out a grocery list. I got the subscription with a discount so when the time to renew came around, I just could not justify the extra expense nor did I feel like I could commit to an entire year.


And then I discovered...


I downloaded the app to both my iPad and my phone. (I have an android phone - there is an app for both the iPhone and for android.) I had my husband download it to his phone, too, with the same account. I can type up a list on my computer, iPad, or phone and have the list with me in the store and he can access it, too. It keeps my six-year-old busy when we shop - he checks the items off the list as we go through the store.


Now Zip List has a meal planner. I can add my own recipes to my recipe box on my Zip List or search the archives. I can use the Ziplist Recipe Clipper, similar to the Pinterest Pin It button, and add recipes from anywhere on the internet. All those recipes I have on Pinterest, I can now repin to my Zip List account. When I add any of those recipes to my menu planner for the week, the ingredients are added to my grocery list. There is still a lot to explore and figure out but I am really loving the idea. There is a blog, too, with a lot of helpful info. I see many healthy budget conscious meals in the future!


-Monica

I also did eMeals for awhile and liked the concept behind it but found that there were too many similar meals each week and they really weren't seasonal.  Like hot soup in the middle of summer or 5 different chicken dishes in one week.  Then Monica told me about the Six O'Clock Scramble and I signed up.  I was very much enjoying it and the kids were liking all the meals.  I had no issues with it and was quite happy that I was preparing healthy meals for my family each week. 

And then Monica told me about ZipList. 

I checked it out and canceled my Scramble account.  There is an extensive archive of recipes and not just main dishes.  There are desserts, sides, and beverages, too.  You can also create your own recipes to add to your recipe box for staple meals that your family enjoys.  I find it to be a little like Pinterest for foodies.  


-Emily

Monday, May 14, 2012

Monster Britches

About a year and half ago I found this tutorial for diaper covers from MADE.  I have used it many, many times to make a diaper cover for various outfits I have made Natalie.  It is a fantastic pattern and tutorial and is a perfect fit.

But my favorite thing that I made with this pattern are Monster Britches.  I actually made these particular ones for Gabe when he was a baby and now Mikey can wear them.  The green and blue ones  are cotton and the yellow and red ones are fleece.  


To make these I fused and appliqued the felt faces onto the britches after I sewed the front and back pieces together before I made the casings.  They make a great baby gift and always bring a smile to everyones face.  They sure brought a smile to this guys face.


-Emily


Friday, May 11, 2012

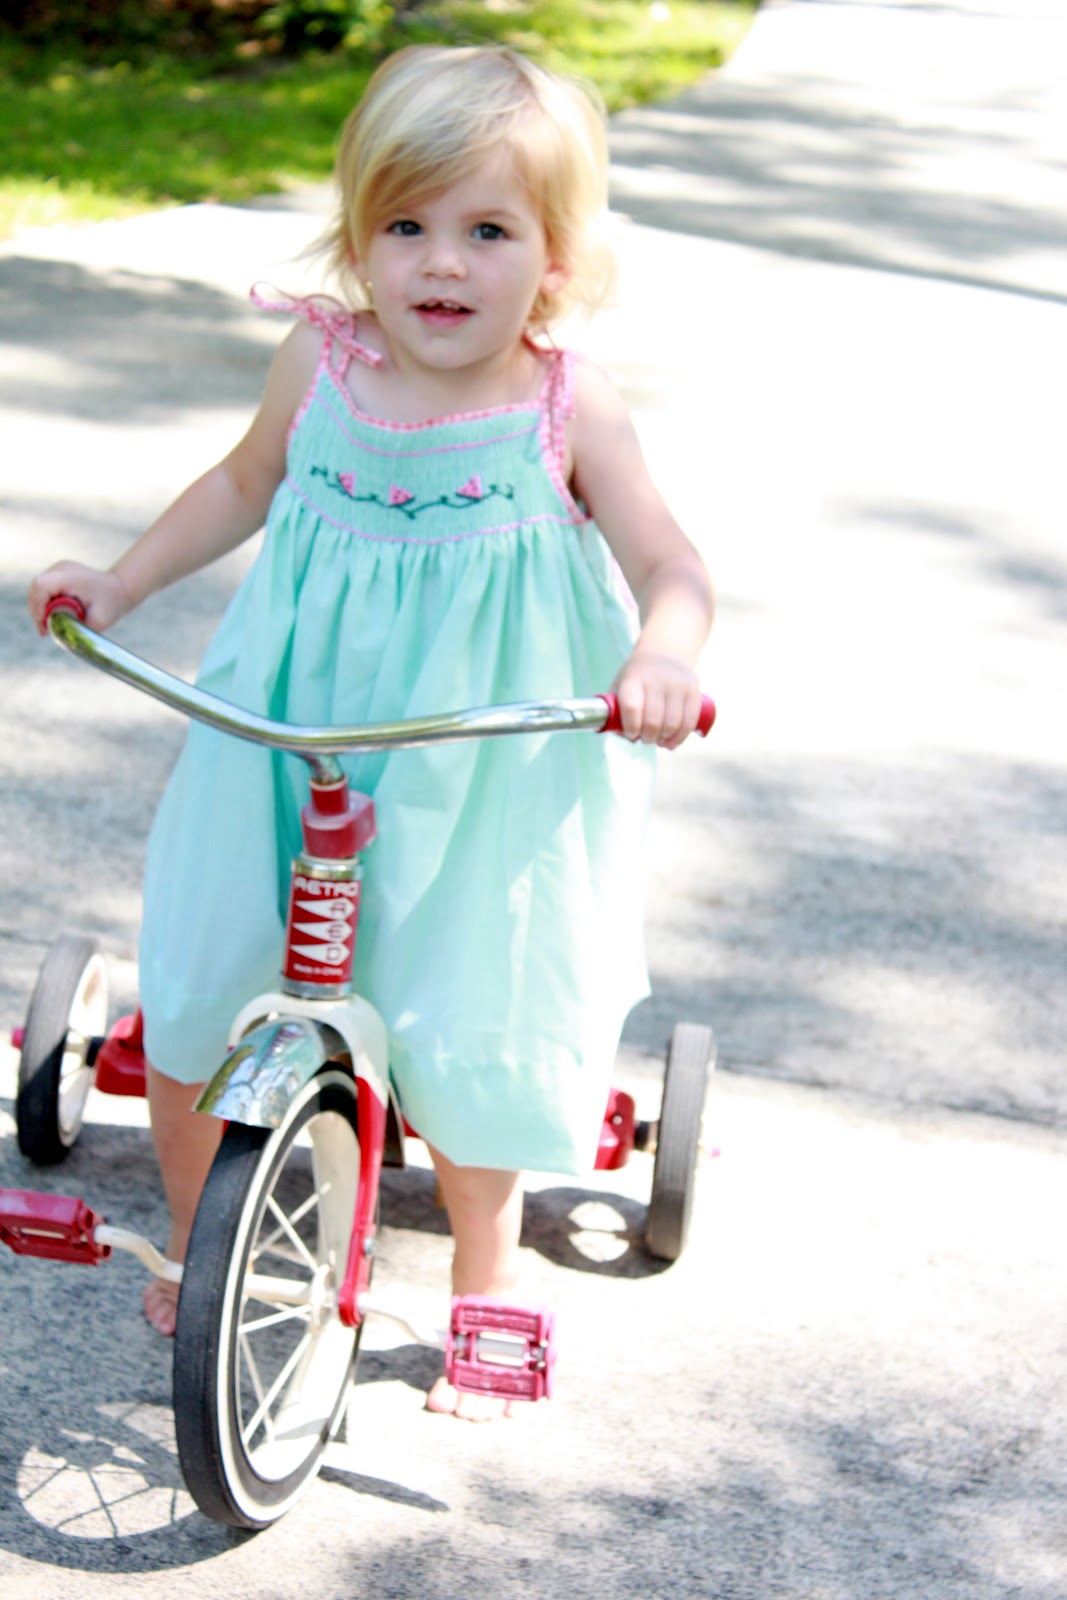
smocked sundress

Growing up my mother made us lots of beautiful clothes and she saved many of them.  The ones I have the most memories of are the smocked dresses.  When I had Natalie, I knew that I wanted to learn how to smock so I could make my little girl beautiful dresses, too.  So I bought a pattern for a bishop dress and this book and taught myself to smock.

Natalie's bishop dress.  My first smocked garment.

I was hooked!  I  made Natalie and Caroline matching dresses for our family beach trip.


and this little sundress for Natalie.

I loved this little sundress and I still love it because she can still wear it as a top 2 years later!  


I loved this dress so much that I thought I would make her another one. It is really very simple, the only time consuming thing is the smocking, which took me two nights.

I cut a rectangle of fabric three times my desired finished width by my desired length plus 3 inches (for the hem).  So, I wanted the finished width to be 14"and the length to be 20", so I cut it 42" wide and 23" long. Also since this fabric is a gingham, I needed to be careful and make sure that the top of the dress was cut in a straight line following a row of gingham.  If I had not done this the pleating would look wavy once it was pleated.  You have to do this with any fabric that has an obvious repeat print like a stripe, polka dot, or gingham.

   I rolled the fabric onto a dowel rod, being sure to keep all the wrinkles out and the top edge even.  


Here is a little tip...use a glue stick to put a little glue on the dowel rod before you start rolling it up. This helps to hold the fabric in place when you start rolling and also helps to keep things smooth. 

Then I ran the fabric through my pleater. My pleater is a Read Pleater and was a gift from my parents' neighbor after Natalie was born.  She was trying to sell it and when my mother told her I was interested in it she gave it to me as a baby gift!!  If you don't have a pleater and aren't sure you want to invest in one (they are pricey), you can have a pleating service do this step for you.  There are many pleating services available on the web and often if you have a local store that offers smocking lessons they might also have a pleating service.  In fact, I used a pleating service at my local smocking supply store when I made Natalie's bishop dress.  It cost me $7.  Another option are these iron on transfer dots to mark your fabric and then hand pleat the garment.  


Notice that I used blue and orange thread and alternated the colors.  This makes it easier to see the pleating rows when you are smocking and alternating the colors eliminates confusion.  I also used a heavier duty thread.

Here is another little tip.  Keep the top edge of your fabric lined up with the first needle notches on your pleater this will ensure that your pleated rows will be even.  


Then I smocked watermelons on the dress.  After I was finished I blocked it, I just steamed it with my iron.  I marked the center and then used a water soluble marker to mark where I wanted the arm holes. 


I used a tiny zig-zag stitch and stitched just inside the line and then cut away the excess.


Then I cut a rectangle for the back that was 20" wide by 23" long.  I gathered up the top cut arm holes to match the front.  Then I made some skinny bias tape.  I used a 1/2" bias tape maker.  Here is a great link for making your own bias tape.  Then I sewed the bias across the top of both the front and the back.

Then I sewed the sides together and sewed bias tape around the arm holes leaving 16" on each side to tie for straps.  Then I hand sewed a 3" hem that can be let down as she gets bigger.  


Thursday, May 10, 2012

Purple knit dress and a great tip for hemming knits

 Thanks for the birthday post yesterday, Emily! So glad to be on this blogging journey with you! xoxo
I nearly got to share my birthday with our new nephew. Our brother Andrew and his wife welcomed their first baby - Silas Mitchell into the world 20 minutes before my birthday. Congratulations to you both and we all can't wait to meet him!

Lately I have been working on perfecting sewing with knits. The biggest problem I have is with hems. It is frustrating spending time making a garment that I am pleased with only to mess it up with the hem. I have trouble with it curling up. I found some terrific tips on working with knits here at http://www.made-by-rae.com/.  More specifically, she lists six ways to deal with hems here. I tried number three- knit stay tape. Except I didn't have knit stay tape (didn't even know there was such a thing). I used this:
Dritz Stitch Witchery tape
I serged the edge first then pressed it up a quarter of an inch, sandwiching the Stitch Witchery in the hem. I sewed it on my machine with a regular stitch but with a slightly longer length. Oh, and I used my beloved built in walking foot (I use that nearly all the time). I gave it another press when I was finished and tada - the best knit hem I have ever made. 

This purple dress I made for Project Run and Play's Flicker group last week - the theme was color, to make an outfit based on one color. I didn't get it finished in time to post by Friday morning but here it is:
The dark purple is a knit I bought at Joann's. (We really like purple in this family.) The light purple is from a tee shirt of mine I had stashed in the upcycle box but it started out white. 
I had to dye some cotton lace purple for another project so I dyed the tee, too. 

I had never tried this before and it was super easy. Just hot water in a tub in the sink for a total of an hour, 
 a quick wash in the washing machine and air dry and I was done. Unfortunately, I don't have pictures of the lace after. I used the dyed tee fabric for the sleeves, hood, and pocket. I used the sleeves of the tee for the sleeves of the dress, cutting them smaller of course. Then I did not have to hem the sleeve, they were already hemmed. My mother looked at the hem sleeve and said, "my machine doesn't do that." I replied, "neither does mine."
The heart on the pocket was from the original tee shirt. The pocket is bulging unnaturally because there was a stuffed kitten in it. (and I really need a fancy camera like Emily's. Paul, are you reading this?)
Yeah, she has crazy hair.
I braided it wet so she would have kinky hair the next day but she wanted the braids out at bedtime because they were "boddering" her. 
The hood. The dress is a tiny snug. I didn't have a pattern and cut in too far under the arms. It was fun to make so I will just have to try it again!

Wednesday, May 9, 2012

Happy Birthday Monica!!

Happy Birthday
to the
BEST sister
and 
BEST friend!!


Love you heaps and heaps and I am so glad that we are finally taking this blogging venture together.  I couldn't do it without you.

Love
-Emily

Tuesday, May 8, 2012

Flowers and Pots

While Emily and her pirate offspring were swashbuckling, my offspring and I were at our parents' house.
We had a great visit, the kids always love seeing their grandparents, and they had fun playing with friends next door.
Anthony and Gabe with their friend Emmett in the tree house.

What is that coming out of Caroline's friend Carmen's shoulder?

Did you know the blue icing on cupcakes stains?

 Near our parents' house there are several small nurseries that have terrific plants and prices. (I got a beautiful hanging basket for $16!) I went with plans to stock up and stock up I did.


This week the weather is going to be mostly perfect for being out in the garden. Since I plan to be outside much of the time planting my loot, I have another project going on with my favorite 2-year-old.
He doesn't know what's in store for him yet...

No, that is not the latest in garden pottery or statuary. My favorite 2-year-old is going to be potty trained. Wish me luck!!

Monday, May 7, 2012

Pirate Costumes

Pirates are huge where we live in Eastern North Carolina.  Blackbeard's ship, The Queen Anne Revenge, was found off the coast, there are renactments of pirate invasions, and almost every school mascot is a pirate.  And this weekend we attended a Pirate Fest.  So, naturally we dressed up as pirates!


I made the (big) boys' shirts from Rae's Flashback Skinny Tee but left the sleeves off.  For Natalie's I used the same pattern but made more of a scooped neck and a skinnier strap.  When I bought the knit fabric I wasn't paying much attention and realized only after I got home that the stretch of the fabric ran perpendicular to the stripes so they were vertical!  Since I wanted horizontal stripes AND I was making these for costumes, I didn't really care so the shirts stretch the wrong way but they turned out fine.  


Natalie's tulle skirt was made from 4 yards of black tulle and 4 yards of red tulle.  I folded each cut of tulle in half and laid the black piece on the floor with the red piece on top.  Then I folded the two pieces in half again so the red was sandwiched in the middle.  Then I sewed an 1 1/2 in. casing along the top folded edge and ran a piece of elastic the size of her waist through the casing.  It took me a lot less time than cutting and knotting pieces of tulle and knotting them onto elastic.  


If you are going to be a pirate you need an eye patch and a bandana.  For the bandanas I cut 20 in x 20 in pieces of knit fabric and tied them onto their heads.  Super fast and easy since they didn't need any hemming.  For the eye patches, I fused two piece of felt together and cut out an eye patch shape.  I put grommets on the sides and tied a piece of elastic about 16 in long through the grommets. (You could also just sew the elastic on if you don't have a grommet tool.)  I used my Silhouette to make a skull and cross bones stencil from freezer paper and stenciled the eye patch.  

The kids were thrilled with their costumes and we won for "Best Pirate Family"!  


-Emily