Sewing our Sanity

Monday, August 20, 2012

Slip covered lounge chairs

Dear Emily,

When we lived in our townhouse, I bought two metal framed folding lounge chairs for our newly landscaped postage stamp backyard. Those lounge chairs are still comfortable but the cushions are awfully faded and worn and the frame is faded and starting to rust. And whenever we leave them out, the birds always poop on them. I didnt really want to get rid of them if they could be salvaged. My first thought was to take the cushions off and spray paint the frame. And to recover the cushions. After inspecting the chairs closer, I found that was impossible because the cushions were bolted to the frame.


Having read several places, including on a can of spray paint, that you can spray paint fabric, I tried to spray paint the whole chair. I stopped after a minute. Not only would it take a gazzilion cans of paint, it wasn't the look I was going for. It made it look like vinyl. Or spray painted fabric.

                          
Instead, I sprayed the frame pink and made a ruffled slip cover. Paul was not real crazy about the pink. I am not sure myself why I chose it, but nothing else was appealing the day I picked it out.
I had a drop cloth already bleached for something else so I used that (and, besides, I couldn't remember what I had originally planned on using it for). The off white skirt on one of the chairs is made from our old bed skirt and the white and blue skirt on the other I found at Goodwill.

It was a quick project, probably took me all of three hours. I am looking forward to many afternoons one of the lounge chairs while the kids are playing in the backyard after school.

In the end, Paul did admit they were comfortable despite the girliness. Maybe that inspired him to do such a good job on the watermelon basket he carved and filled for our party Saturday.

We had a party this weekend with Mom's BBQ recipe, Andrew and Lora's cole slaw recipe, your quinoa salad recipe, Margaret's dressing recipe, my mother-in-law's delicious pasta salad and lots of other yummy dishes and desserts. Including the most amazing eclair cake. Oh, and a moon bounce. What did y'all do this weekend?

xoxo,

Monica

Linked to
Reason to Skip the Housework
Salt Tree

Thursday, August 16, 2012

Applying bias tape with a binding foot

Dear Emily,

The fabric store has quite a variety of bias tape...single fold, double fold, half inch, one inch, quarter inch, a bunch of colors. Looking at the rack, you would think you would be able to find exactly what you need but how often can you not find the color you need? Or don't you sometimes want to trim something with a coordinating fabric, solid or print?

Recently I bought two of these

I have the yellow one and the largest, black one. Oops. Just double checked mine. My large black one is by Prym while the yellow one is Clover. The smaller makes 1/2 inch tape and the larger makes one inch (which means, if you are making double fold bias tape, the result is 1/4 inch and 1/2 inch tapes). It was a little confusing when I bought the tape makers. The smaller one makes really tiny bias tape. The dress I made it for called for 1/2 inch but I sure as heck wasn't going to make any more. Besides, I didn't have the right size bias tape maker.

Now, the main point of this letter it that I finally, for the first time, applied binding perfectly! Silly how excited I am about this, but seriously, this is a momentous occasion. I made my own bias tape using this tutorial from Made. Dana from danamadeit.com has another tutorial for applying bias tape and I think I remember your telling me you used it with success. I saw your binding on one of Natalie's dresses? It was very neat and well applied but was sewn in two steps. I had an entire dress, an apron dress, to bind (picks later, when I sew the tie on it) and wanted the quickest, easiest way to apply the binding. I had bought a binding foot for my beloved Janome sewing machine awhile ago. I tried using it once, got frustrated, and set it aside. Way aside. This time I pulled it out, I was determined to make it work.

I figured out a trick.

The fabric needs to be held between the fold of the bias tape as it feeded into the foot and it needs to be held at the same angle the feed part is.

Totally technical, I know, and it is a funny looking foot and I have no idea what to call that part of the foot and I am too tired to google it. Plus, it might be the one thing google has no answer for.

How many times do you thing I can write bias tape? Bias tape, bias tape bias tape.

Goodnight,

Love,

Monica


Monday, August 13, 2012

Magnetic Board

Dear Monica,

It has been forever since I have written a post and even longer since I have done any kind of sewing.  Since we came back from our trip, I have been focused on organizing our house.  I started with the kitchen and cleaned out all the cabinets and rearranged the dishes and pots and pans and collected an entire box of items to donate. I also rearranged the pantry and the fridge.  I used a lot of tips from IHeart Organizing and the kitchen looks so much better! And the bonus is that nothing comes crashing down on my head when I open my cabinets.

As I was de-cluttering, I found a bag of magnets that had some magnetic letters and a Leap Frog animal matching game in it.  We have a stainless look refrigerator and while it is magnetic, it scratches terribly so we just opted to put the magnets the kids play with away.  A while back on Pinterest I saw a great solution to our dilemma and seemed like a good time to finally use one of those ideas I pinned.

Here it is!  Our new magnetic board.


Yep, it is a giant metal drip pan from the automotive department at Walmart.  I paid $12 for it.  I need to get/make some more magnetic letters and I think I might paint it with chalkboard paint to make it even more fun.  Sam asked me why I hadn't done it a long time ago.  It would have kept the fridge from being scratched.  

XOXO
Emily


Monday, August 6, 2012

Boat shirts and seersucker pants

Dear Emily,

I have had a cute pattern for boys' shorts since last summer. It is a Burda pattern and I had never used one their patterns before. Mostly because they are never on sale for .99 in Joann's. I had heard Burda patterns were difficult to use but I didn't think so, it was just a little different though I would not recommend one for a first attempt with a sewing pattern.

This is the pattern:


SewingPatterns.com
These are the pants, in a dark gray seersucker:


They are the midcalf length ones, like the pair on the left, and I had planned on using elastic cording in the hems with cord stops but Anthony vetoed that. That was ok with me - I wasn't sure if it would make them look "girly" for a seven-year-old but I do think they are cute with the cords.


For the pocket piece on the front and the back, I cut the fabric so the stripes are horizontal while the rest of the stripes are vertical. I liked the pattern and would definately use it again. I really liked the way the waistband went together. The next time I make a waistband, I'll take pics and send you a how-to.


I used the Silhouette to stencil boats on shirts. Since we were at the beach with the boys' 10 year old cousin Nate (on Paul's side), I made him one, too. Three different boats for three different boys.

Cousins.

Gabe's cheesy smile. Really. He says "cheese" when the camera comes out. And makes not much of a real smile. We need to work on that.


Nate's boat. I used Tulip screenprinting ink. I'll tell you about that in another letter. It is fantastic!


I would lend you the pattern but I know I will be using it again!

Love,

Monica

Joining the link party at The Creative Itch.


Tuesday, July 31, 2012

RIT dye

Dear Monica,

I have this great hat that I have had for about ten years.  I love everything about it except the color.  It just doesn't match anything.


So, I thought I would dye it.  I bought some navy blue RIT dye.


I put 3 gallons of hot water, the bottle of dye, and a cup of salt into a large bucket.  Put the hat in and made sure it was completely covered with the water.


I left it in the dye for an hour, making sure to stir it so the dye would be even. After the hour was up I poured the dye down the sink and rinsed the hat with cold water until the water ran clear.  


Do you want to see the finished hat?

Yep!  Complete and total failure!!  The hat is a cotton/polyester blend so it should have retained at least some dye. I did successfully dye my hand and the paint stick.


XOXO
Emily


Thursday, July 26, 2012

Watermelon Pants Set

Dear Emily,

I finally had a chance to take pics of Caroline in the outfit I finished for her this week.

I have had the pattern for awhile, as well as the fabric. I have a fabulous quilt shop nearby, Tomorrow's Treasures with a great section of heirloom sewing supplies and fabric.

I used this pattern (view A)...

I have had the material and the pattern for about a year, I am embarrassed to say. Too many things on my "to sew" pile! The pattern was pretty easy, especially the pants. The seams in the pants were sewn with French seams so there is a nice tailored look. On the inside. Where no one can see.

I made the piping for the top with the same material I used for the pants. I could not find buttons for the top in the right shade of pink so I bought a covered button kit and made covered buttons from the same material I used for the pants and piping.


They were not hard to make but the thingamajig that you put the button in to hold it while you press the shank on doesn't work so well. If I wasn't careful, the parts would slip and go together crooked. I did use the "tools" that came with the kit to get the pieces set together but had to take the assembled button out of the white part to get in pressed together tightly.

The color looks funny on here, more of an orange than pink. Honest, it really is pink.


I love the side buttons. The bottom button is almost at her waist so the rest of the left side is open. I would definitely use this pattern again but for a fall/winter outfit, making the pants long and adding long sleeves to the top.


Another outfit Natalie gets one day!

XOXO

Monica

Monday, July 23, 2012

Beauty Balm/BB Cream

Dear Emily,

I haven't shown Caroline a picture of Natalie's circle skirt yet. She is going to want one as soon as she sees Nat's.

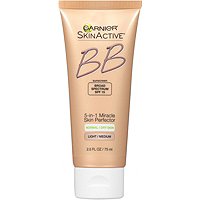
Have you heard of the latest thing in makeup? Our mother was the one who told me about it. She is pretty hip, you know. Anyway, the latest thing is bb cream, the "bb" standing for "beauty balm." it is an all-in-one primer, moisturizer, sunscreen, among other things, depending on the brand. Mom and I tested several in Ulta...Smashbox, Garnier, Stila, Too Faced, and Boscia. The Boscia was my favorite but a little out of my price range at $38. I ended up buying the one by Garnier, "Skin Renew".


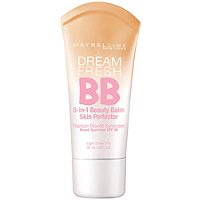
I do like it. I wear it on days I need some coverage but want something quick. (I have been using Bare Minerals lately. I really like it but it is not quick.) The other day, I came across a coupon for Maybelline's version, Dream Fresh."


A dollar off so I had to try it. I like it as much as the other but the main difference is Maybelline's has an SPF of 30 and Garnier's is 15.

So, there you have my beauty tip for the week.

Hope you are finding some time to sew! I have a couple projects to share with you soon. And I just remembered I have to make slips for the girls to wear under some beautiful antique dresses our Aunt Judi sent. Send me Natalie's measurements when you get a chance! (chest, waist, and nape of neck to just below the knee)

Xoxo

Monica

PS I just did this whole post using the Blogsy app on my iPad. It has taken me awhile to find my way around the app but I think I have finally figured most everything out.