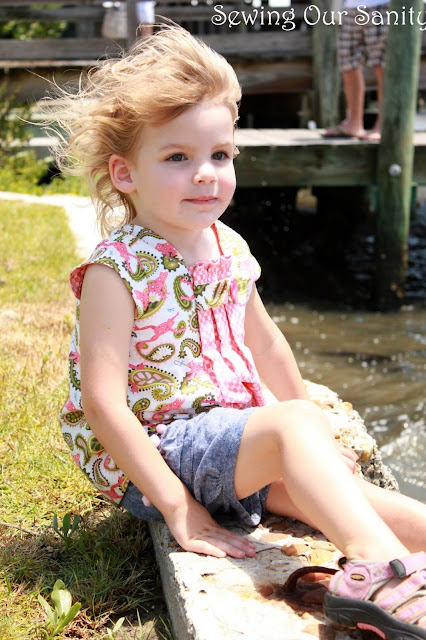
Yesterday I posted about the Oliver + S Birthday Party Dress. I really love this dress and kept thinking that it would make a really cute and comfortable tunic. Since that is not an option for the pattern I decided to make my own changes to the pattern. And because so many of Natalie's clothes are sleeveless I thought I would add some cap sleeves for something a bit different.
I really loved how it turned out so I made her a second one!
(Super windy day at the Arts Festival)
To start modifying this pattern, I decided that I wanted the finished tunic length to be 16", so I adjusted the front and back side pattern pieces to be 17" long for seam allowance.
Because the finished dress had a slightly curved edge, I placed the bottom facing piece on my new tunic line and traced it to get the slight curve. I also figured the new facing pattern piece. As you can see in the picture the tunic cutting line for the facing piece is 1/2" longer.
To figure the length for the front center and back center panels, I matched up the dots on the pattern pieces (see the arrows) and matched the new tunic lines from the side pieces.
To get the front lining piece, I placed the pieces across the front side panel pattern piece and the center panel pieces and drew the new tunic line 1/2" longer than the other two pieces. (Sorry the picture is so grainy.)
Next I made the cap sleeve. To do this, I overlaid the front and back side pieces by 1/2" for the seam allowance and measured the arm. The arm for the size 4 is 11".
So I cut a piece that was 10.5" long by 3" wide and rounded out one side.
To assemble the tunic I followed the pattern and assembled the front and back pieces. BUT I sewed the pieces together at the shoulders (not the sides as the pattern calls for).
Then I attached the cap sleeve and pressed the seam towards the tunic.
Next, I sewed the shoulder seams of the facing pieces together. Then I attached the facing to the tunic following steps 1-3 in the pattern, which will attach the facing around the neck line of the tunic.
Then, I pinned the facing to the armhole being sure to sandwich the sleeve to the inside.
After sewing the facing to the armhole, I pulled the back piece through the tube created by sewing the armhole facing, to turn the tunic right side out.
Finally, I sewed the side seams of the lining and the dress in one long line.
Then I finished the rest of the tunic just as you would finish the dress.
I paired it with the Oliver + S Puppet Show shorts.
XOXO,
Emily


Love this! I recently picked up the Birthday Party pattern but have yet to sew it...I'll be giving this a try.:)
ReplyDeleteThank you Cindy! I love this pattern and I can't decide if I like it as a dress or a tunic. Now I think I might try adding the sleeves to the dress and see how that turns out.
DeleteSo pretty! Just found you via facebook- looking forward to reading more!
ReplyDeleteThanks Elizabeth!
ReplyDeleteLOVE the cap sleeves and the tunic length. Very pretty - and now I want to buy this pattern!
ReplyDelete